TranzPort Quote
“Frontier Design Group was demonstrating a prototype of the TranzPort, a wireless DAW controller that was one of the coolest products of the (2004 AES) show.”
- Mike Levine, Electronic Musician
Quick Facts
- Wireless DAW control: operate your computer-based digital audio workstation from anywhere in your studio
- Compatible with Mac® and Windows®
- Supports Pro Tools®, Logic®, Cubase®, Digital Performer®, Sonar™ and other DAW software applications
- Two-way interface: get timecode position, track name/number, track volume, pan settings and more via backlit LCD display and LED indicators
- Uses high-frequency RF technology: no wires or line-of-sight required, and no added interference
- Dedicated buttons for often-used functions, including transport controls, marker/locate buttons, track control (level, pan, solo, mute, record arm) and more
- Operates on AA batteries
- Small, lightweight design
- Footswitch input
- Microphone stand mount, custom padded carrying bag, and standard footswitch are available from the on-line store
TranzPort and Ableton Live

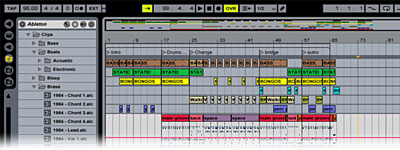
You asked for it, here it is! TranzPort, the ultimate portable control surface, and Ableton Live have finally come together in Live, starting with version 5.2.1. With a new dedicated control plug-in, TranzPort now operates many of Live’s unique features from almost anywhere in your studio, or the dance floor.
Wireless control of Live’s basic transport functions alone might be helpful, but TranzPort doesn’t stop there. With TranzPort you can navigate though your tracks, and remotely fire scenes and clips with ease. Set playback levels and panning, mute, solo and arm tracks for record without ever running back to the computer or squinting at your laptop screen. Toggle loop or punch modes, drop markers or undo the last take. Ableton’s native mode plug-in for Live even lets you quickly flip between Arrangement and Session views with just a simple button command.

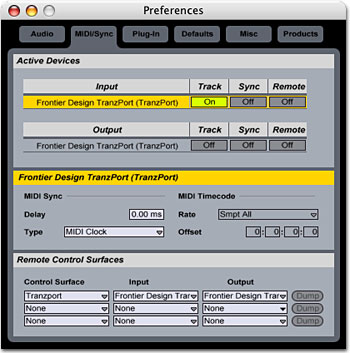
Setting up Live 5.2.1 (and later) to work with TranzPort couldn’t be easier. After installing TranzPort, open Live’s MIDI/Sync preferences panel. In the Remote Control Surfaces section select TranzPort as shown below, and assign both Input and Output to TranzPort. That’s it, you are ready to go.
On the Frontier Design Group website or your TranzPort CD you will find a couple documents with information specifically for Live users. The first, Live and TranzPort contains detailed instructions for configuring TranzPort in Live. It is also a guide to using TranzPort with Live including information on how to use some of TranzPort’s less-obvious features, as well as a quick reference chart listing all of TranzPort’s controls.
The second file, Live Layout is a single page picture of TranzPort with overlaid text summarizing the Live feature set. It may be helpful to print this file and have it handy as a quick reference guide.
We encourage visitors to our user forums to post their comments and questions. Other users often have useful ideas and experiences to share, and we monitor the posts to provide additional input.
Below are other TranzPort related links that may be useful:
Copyright © 2026 Frontier Design Group


