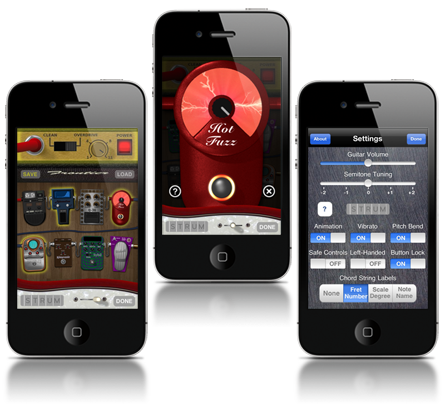

Awesome sound
iShred is all about using the highest quality sound ... and letting you morph, warp and distort it to your hearts content using eight stompbox iPhone guitar effects.

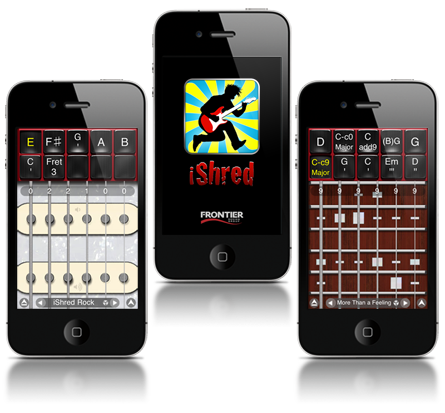
Comfy control
No chord fingering contortions required! Tap a button and the chord or fretboard is there, ready to strum or pick.

Your 15 minutes
iShred has powered the biggest iPhone musicians and bands. Are you next? See iShred in action.

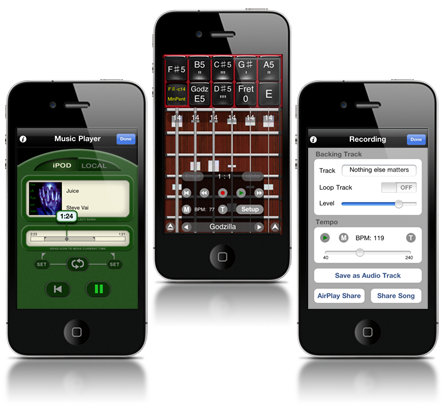
To the clouds
Built in network backup means you can avert disaster as well as share your songs with bandmates and friends.
WowZa Wowza Alan D - United Kingdom 
It's ridiculously great value for money. It's got me shakin and a movin ... Pickin and a groovin !!! I love it.
Demasiado bueno! Kilo80380 - Peru
Esta app a sido la mejor guitarra para iphone que e tenido!! Esto si vale la pena comprar
オススメ stlll - Japan
他のギターアプリに比べて格段に弾きやすい! ふと思いついた曲にコードをつけるときなんかすごく便利です。音楽やってる方にもこれはオススメです!
iShred! Fardin - Germany
Einfach Suberb! Macht richtig Spaß!
Shred Jaxziel - United States
Luv it. Keeps me busy when not workin on my main axe , sax and boards. Always wanted to be a guit player but never made the grade till this app. Thanks crew for your efforts
MacWorld
Of all the guitar apps available on the App Store, Frontier Design's iShred is my favorite.
iShred Rimor69 - Canada
Best 5 bucks I ever spent!
Wie Zero01 - Germany
Beste Gitarren app im Store , absolute kaufempfehlung ist jeden Cent wert
Класс!!! WolfHan - Russia
Отличная программа!!!
Best guitar app Gpvoiceactor - Canada
I was pleasantly surprised by the amount of features and the quality of sounds. Easily one of the best guitar apps in the app store. A must have for guitar lovers!
Strummin' Hector - United Kingdom
Soooooo much more fun than Guitar Hero. Real songs, real chords, real licks. Lovin' it.
I can play a guitar YAY!!! MgdmGdmgD - United States
So my friends and I and our kids are going camping. We left the real guitars at home but we are all bringing our iPhones and well our guitars are just much more space efficient. They fit in our pockets. :-D
The Quintessential Guitar App TouchMyApps
By the first strum, you realize that iShred is a virtual guitar like no other - it is in fact the tool for ultimate guitar supremacy on an MP4 player scale.
Очень доволен Terbiyarchitectuvarium - Russia
Особенно нравится Air Play:) Множество интересного! Прога действительно что надо!
A must for all guitarists Sizzilla - United States
If you are a fan of Guitar by frontier then don't even think twice before buying. Absolutely worth every penny!
Recomendo Eduardo - Brazil
Divertido e muito fácil de usar.
GREAT! Darth Chaos - United States
This is among my top ten apps. I love how you can create your own works (or renditions of popular songs) and upload them via AirPlay.
Ótimo Lukinha - Brazil
Perfeito para quem quer passar o tempo e se divertir um pouco, melhor ainda para quem sabe tocar guitarra ou violão.
Cool myungz - Thailand
Best guitar app.
Super! Stefan - Germany
Die Gitarre für die Tasche! Macht viel Spaß :)
好软件 酸角 - China
制作利器!
WOW!!! Musical309 - United States
2.0 Earthquake update. Thanks!!!!!
非常好! 冷炙 - China
很好的软件,强烈推荐!我花钱买的第一个软件。
Best App Vip23 - Switzerland
Super App mach viel freude dazu zum üben und neue griffe lernen hammer, plus online songs loaden:) dafür würde ich auch mehr zahlen!
Εξαιρετικό εργαλείο μουσικής Dimitris V - Greece
Φοβερός ηχος πολυ ωραίες δυνατότητες κυρίως για ζωντανή ηχογράφηση αλλα και εκπληκτική ιδέα για την χρήση του τηλεφώνου για ζωντανό παιξιμο
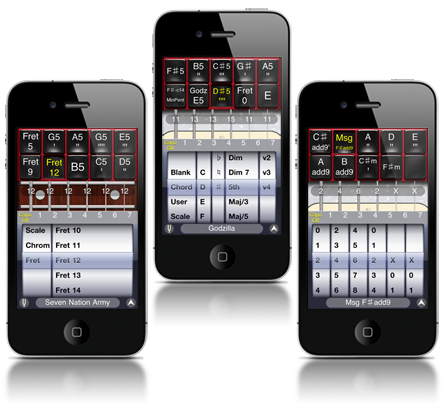
Custom Chords! Patrick - United States
You can actually play with this app! Plus you van build any weird custom chord you need = Home Run!!!
Caspita Fedetehk - Italy
Ho capito solo ora come inserire nuove canzoni e scegliere le corde!!! Fantastica!
Amazing jjw14 - United States
High end technology for peanuts. Don't know how they do it. Stellar guitar app.
Outstanding Wayno800 - United States
By far the best guitar app I have ever seen..well worth the price!!
Best app sirah - United States
Finally an alternative to playing air guitar in front of the mirror.
Born to rock
iShred sends the highest quality guitar sounds through a bank of crazily configurable stomp box effects, rendering the result into screaming, distorted, wailing, looping, feedback-fueled audible gold! Whether you want a clean trebly surf sound, a spacey rock lead, or an all-out metal assault, iShred delivers the goods.
Anyone can play
Are you a total guitar newbie? Hey, no music experience required to enjoy this sound laboratory: starter songs are included. The serious six-string guru will love the convenience of this portable music notepad and the crazy effects playground. Easy to use, awesome sound, and it's always with you wherever and whenever inspiration strikes!
Power chords
iShred provides a playing interface that's powerful and easy to learn. Create your songs from a huge library of over 2000 built-in chords, scales, and fret positions. Or create your own custom chords and tunings. Buttons provide immediate access to all the chords and scales you need for a song, making it easy to switch between strumming chords and playing melodies.
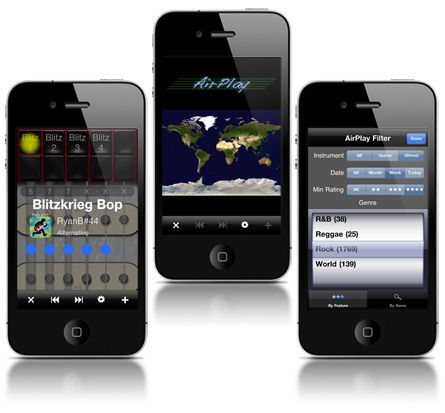
A world of music
Looking for inspiration or just psyched to have others hear your god-like riffs? iShred features AirPlay with over four thousand shared songs from around the world. Sit back and listen or download songs to learn. Or upload your own creations to AirPlay and let the world listen and rate it.